| Create a PLOGA PLOG (Pilot's Log) is used to plan a journey. It tells you the times, bearings and distances between each waypoint in your journey.
Pilot Plan supports the creation of PLOGs in two distinct sytles; A) Creation via menu based system or B) Creation via dropping pins on the map Both will result in an emailable PLOG that can then be shared / printed out as requried. |
Creation of a menu based PLOG
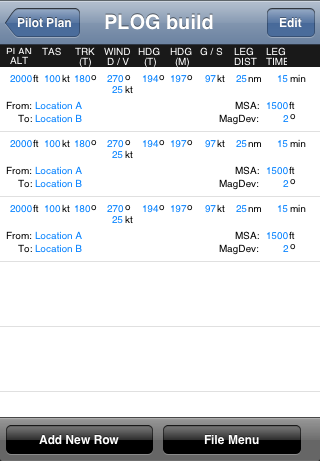
| Choose "Create / Edit existing PLOG" from the main menu and you will be presented with a blank table with a few buttons to let you add rows, save your PLOG etc.
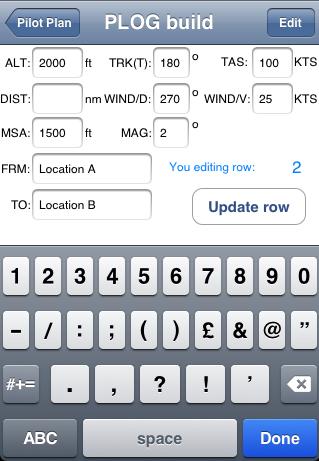
Start by choosing "Add New Row" and a view similar to the left is presented. Enter in appropriate values for the first leg of your journey and then hit ADD ROW. The entry is silently added to the PLOG and the incrementer (in big blue text on the right hand side) will advance to "This will be entry 2". Enter values for the second leg of your journey and hit ADD ROW. The incrementer advances to row 3. Keep entering rows for all the legs in your journey. Once finished, hit "Done - return to PLOG" and the various legs are presented in the table. If you want to correct the information in a particular leg, simply tap and you can edit it. Hit "Update Row" to save the changes. You can delete individual legs by swiping left to right and you can re-order them by choosing "Edit" in the top right hand corner and then pressing and holding, to drag the indivudal rows up & down. |
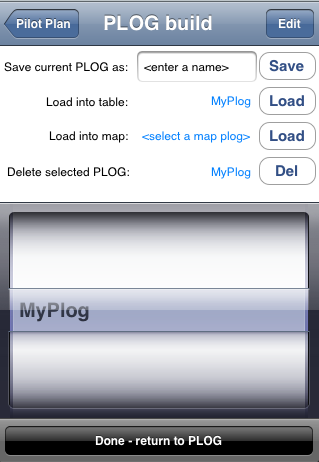
| Choose "File Menu" to save your PLOG or load a previous PLOG you've created. PLOGS created using this menu system can only be loaded into this menu / table - they cannot be loaded into the map since there's no Lat / Lon information store for the waypoints. |
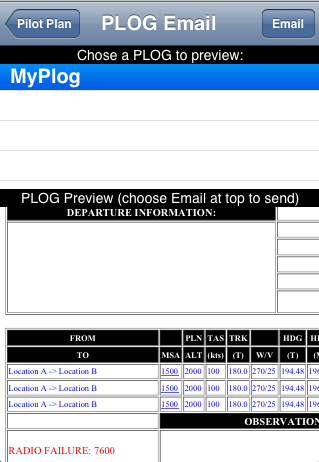
| Viewing the outputMake sure you've saved the PLOG you created earlier above and then go back to Pilot Plan's main menu.
Then, choose "Email existing PLOG" and select the PLOG you want to preview from the upper half of the screen. The PLOG is then built and displayed in the lower half. You can zoom into the PLOG itself using the normal "pinch to zoom" method and drag the PLOG around to see it in its entirety. If you're satisfied with the PLOG hit "Email" in the top right hand corner - you can then email the PLOG to yourself / someone nearby with a printer and print it out for actual use. |
